I use PixInsight for all my processing. Apart from occasionally removing de-focus fringes around stars with Adobe Lightroom from pictures I make with regular lenses, it is in fact the ONLY tool I use for processing. Once I started the trial and got the first result I never turned back to any other tool.
PixInsight does have a steep learning curve however, especially if you just started with astrophotography. So I decided that I will start writing PixInsight tutorials on this blog. As a start I want to share my basic DSLR workflow, because I get asked about that a lot lately.
The best DSLR workflow in PixInsight?
To be honest; every time someone asks me about my workflow I always answer with; “it depends”. First of all, it depends greatly on the quality of the data you are working with. Secondly, it depends on the object you photographed; the workflow for a galaxy is just different than that of a widefield image with lot’s of nebulosity. And last but certainly not least; it greatly depends on personal preference and taste. One of the things that is great about PixInsight is that you can do things in (many) different ways and it will come down to personal preference or just habit what processes you will use for your results.
However, of course there are basic steps that will be present in every workflow and are required to do in a certain specific order. So let’s look at a basic DSLR workflow for PixInsight that contains these basic elements.
I can also recommend the book Inside PixInsight to learn more about each of the workflow steps

The basics of a DSLR workflow in PixInsight
Every time you process the images you will go through the same four stages and each of these stages will have some basic steps you need to take. Some of the steps I talk about in this workflow are required, but most are optional. I’ve indicated or required steps by adding a * next to it.
Before we start with the workflow however, make sure you have the right DSLR_RAW settings applied in the Format Explorer in PixInsight. You should use the ‘Pure Raw’ settings.
Now let’s have a look at the basic DSLR workflow outline. Every step in this workflow will be described in further detail in separate posts.
- Preparation and combination of your data
- a.) Calibration and debayer RAW files
- b.) Selection of the light frames you want to use
- c.) Alignment of all the lights
- d.) Combination of all the lights in to one stacked image
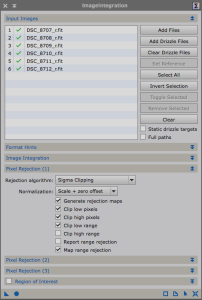
- 5 to 12 frames -> Sigma Clipping
- 13 to 20 frames -> Winsorized Sigma Clipping
- 20+ frames -> LinearFit Clipping
- The linear stage
- a.) Crop away the dark edges of the frame
- b.) Correction of gradients, vignetting and/or other artifacts
- c.) Color balancing and correction
- d.) Deconvolution (advanced)
- e.) Noise reduction
- The stretch *
- a.) MaskedStretch for the initial stretch
- b.) Histogram stretch per channel to finalize initial stretch and do final color balancing
- c.) Curves for initial contrast enhancement
- The non Linear stage
- a.) Dynamic range improvements
- b.) Sharpening
- c.) Star reduction
- d.) Final curves tweaking for color and contrast
This stage is all about selecting and preparing the photos you took during your imaging session(s) and creating one stacked image from it all.
Calibration is optional and in fact I recommend to skip this step if you are just starting out with astrophotography. Even though taking flats, bias frames and dark frames is really easy, it just adds (a lot) to the complexity initially.
When you are ready to start using this step in your processing and if you want to use flats (recommended) and/or darks (personally not recommended) you’ll need to calibrate not just your lights, but also the flats and darks with bias frames. Furthermore you’ll need to do this with the non-debayered RAW files and debayer the calibrated files. This sounds complicated, but luckily there is one script in PixInsight that does all this for you in one go; BatchPreprocessing. Just load up all your frames, hit Run and you are done.
Read more about it here: Calibration and debayer of RAW images
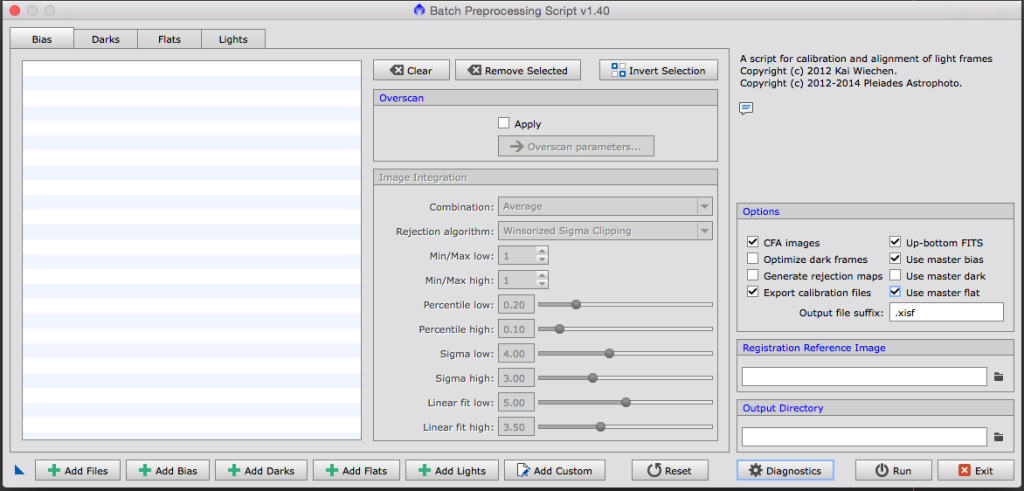
You’ll need to throw away any bad frames you want to exclude from the final stack. A frame can be bad due to a number of reasons; clouds, tracking or guiding errors, stray light falling in, etc. You can visually inspect many frames very easily using the Blink process.
Furthermore I highly recommend to use the SubframeSelector script to have PixInsight mathematically inspect all your frames. This allows you to not just reject bad frames, but also assign a weighing to each frame in the final stack. This way you make the most use of your best frames.
This step is straight forward and very easy. Use the ImageRegistration process to align all your lights.
At this point the image is what we call ‘linear’. For now it is sufficient to remember that the image is Linear until we apply some form of stretching of the histogram to it. Some processes should be done when the image is still linear, so that’s why this is important to remember.
As you can see the image is very dark or even completely black. To still be able to see what you are doing, without really stretching your image, PixInsight has the ScreenTransforFunction available. Use this to get sort of a preview of the stretched result, but keep in mind you are still working in the linear stage!
Things we need to do in the linear stage are:
Because of the different alignment of each light frame you will often end up with thin black edges in the stacked image. Furthermore you might have other artifacts like reflections, amplifier noise and to strong gradients or vignetting you want to crop away. It is important to start with this, so the data you want to get rid if anyway, doesn’t badly influence any of your processing steps. You can do your initial crop using the DynamicCrop process.
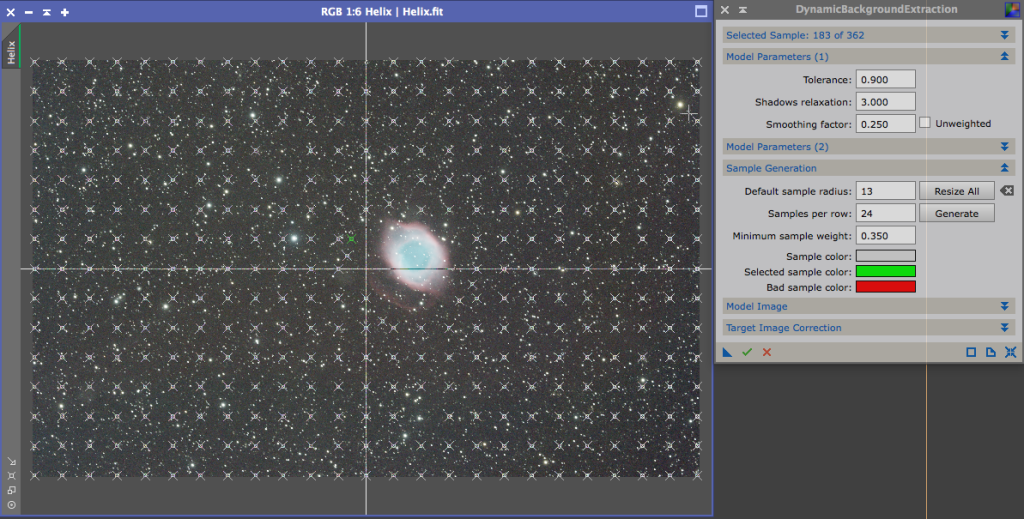
PixInsight has a very powerful tool that allows you to correct vignetting and background gradients quite easily; DynamicBackgroundExtraction (DBE)
I usually increase the tolerance to 0.9 and the Minimum sample weight to 0.350 for a greater initial coverage of sampling points when you hit ‘generate’.
Choose either Subtraction or Division as the desired Correction method. Which you need to choose depends on the artifact you want to correct; vignetting requires Division, while gradients will benefit more from Subtraction.
Always check the resulted corrected image for newly introduced dark spots, as this can happen easily whenever a sample point is mostly covered by a star. Go back to your DBE and adjust the sample points so that they cover just background.
Don’t be afraid to use this process multiple times if needed!
There are a lot of ways the initial color balance can be way of in the image you work with. Especially if you use light pollution filters you can end up with quite distorted colors. But even under real dark skies the camera can deliver you a wrong color balance. Luckily this can easily be corrected in the linear stage by using BackgroundNeutralization and ColorCalibration.
Depending on the quality of the data just using BackgroundNeutralization can be sufficient in my experience. Simply create a preview of a (small) area of the image where there is just background and use this as reference in the BackgroundNeutralization process. After this apply ColorCalibration. You can view this video here for more guidance on how to use this process.
Run SCNR once after you color corrected. SCNR is presented as a noise reduction process, but I consider it to be more of a color correction process that removes a color cast and normalizes the colors. (check the histogram before and after to see it’s effects). Usually you should only apply this on the color green, as this is usually not a color present in deep sky objects much but is the color for skyglow for instance and that’s why a lot of images can have a green cast over them. You could run SCNR basically at any point in your workflow, but I prefer to run it within the color balancing and calibration phase.
Skip this step if you are a beginner. Deconvolution is the process to try and compensate for the blurring effect of the instability of the atmosphere and imperfections in your optics. You first need to build a mathematical model of this blurring by using the DynamicPSF process. After this you can use this PSF model in the Deconvolution process. A very good and detailed tutorial on this is available on the PixInsight website;
Deconvolution and Noise Reduction Example with M81 and M82
The MultiLinearTransfer process is very powerful to use for noise reduction at different scales. The previously mentioned tutorial also details out the usage of this process to reduce noise. Save the settings used here in the MultiLinearTransfer process for later usage, as in my experience these will be good in almost any situation.
Note that ALL steps here are optional! In most cases you will do some or all of these step, but I did none of them with my wide field image of the Pipe nebula for instance. This is mainly because this is a wide field of a part of the Milky Way where you have a lot of signal (hardly any regular background) and the data is of such good quality.
I deliberately talk about the stretching of the image as a separate stage, as this step where you go from Linear to non Linear is crucial for a good end result with preservation of small and colorful stars.
Basically I take a three-step approach when stretching:
This script will mask the stars while stretching your image in many iterations. Doing so will prevent (most) stars to end up as blown out white spots (or even blobs ;)) in your stretched image.
You might want to try different settings here for various images, but most of the time I use 75 iterations and a target median of 0.12
You can read a detailed article on the use of MaskedStretch here.
 After the MaskedStretch you’ll probably end up with a bright white image and it looks something went wrong. However, remember the ScreenTransferFunction! This is most likely still active and applying the same virtual stretch to your image that is now stretched for real. Simply disable the STF and you’ll see the real result. Most likely the MaskedStretch resulted in an image that still needs some stretching, and maybe a slight color adjustment.
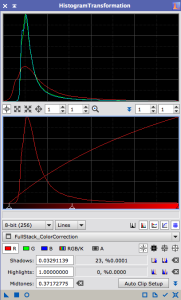
Now I use the HistogramTransformation process to adjust each channel separately. In most cases the color balance will be good if you align the histogram of each channel. For each channel, move the left marker to the right until you start to see pixels clipping for the Shadows. Now move the middle marker to the left until you roughly align the peak of the histogram on the first vertical line in the top graph. Repeat this for every channel and try to match the curves in terms of positioning and the width.
Make sure you use the preview to see the effects of your changes and to prevent you from over stretching the image.
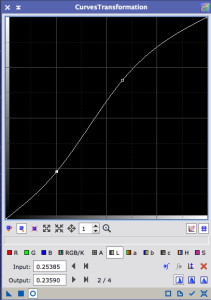
Please note that this is still the ‘rough’ adjusting of the stretch in terms of contrast and saturation. For the final tweaking and detailing you should always use different kinds of masks to manipulate only the desired elements of your image. (ie; in many galaxy images you don’t want to increase saturation for the background, as there is only noise there)
After the stretches of the previous step the image is no longer in the linear stage. In the non-linear stage we take the last steps to finalize the image and achieve our end result. One thing to note is that almost in every step in this stage you will have to work with (different) masks. In my opinion, one of the things that will greatly improve your results is the ability to create excellent masks for every step which is certainly not easy.
The most common steps for me in this stage are:
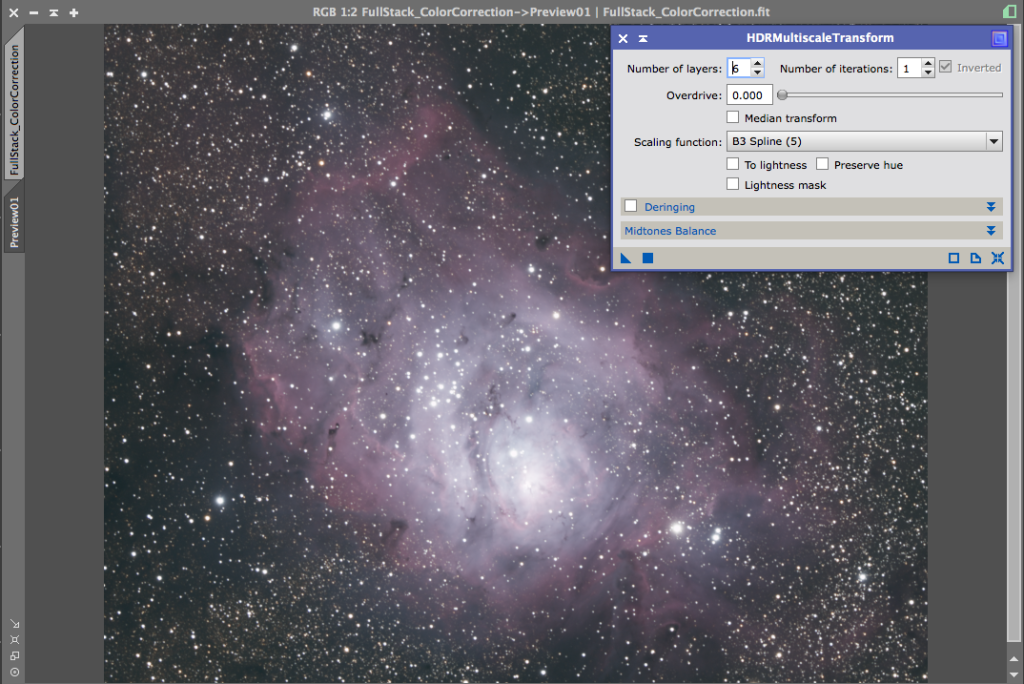
Quite often you will have areas in your image that are much brighter than others. The most famous example probably is the core of M42, but you’ll most likely encounter it with cores of many galaxies as well as the center of some emission nebulas like the Lagoon nebula. To improve the dynamic range of your image you can use the HDRMultiscaleTransform. Make sure that you use a good mask to protect bright stars and other areas of your image. This can be either a StarMask where you increase large structures or a more complete ‘luminance’ or range mask.
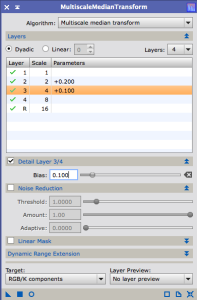 There are different ways to perform sharpening on the details that are important to the image. I always use the MultiscaleMedianTransform for this. You can sharpen by simply increasing the Bias for different detail layers. Be very careful with this as this can easily result in to ‘harsh’ and overprocessing of the image. In order to prevent sharpening (and increasing) of noise in the background you should always use a mask. RangeSelection can be useful to generate a mask, but more easy and resulting in very subtle changes is to just extract the luminance of the image and apply it as a mask directly or after applying curves to it to increase the mask effectiveness. This will most likely cause stars to increase as well, so it’s better to further improve the mask. I basically have two different ways I do this; Either by using PixelMath to subtract a StarMask from the luminance layer, or erase stars from the luminance layer with a very harsh MorphologicalTransformation and simply CloneStamping the remaining stars out of it. I’ll discuss the creation of masks in more detail in a separate tutorial later.
 A crucial step that is often overlooked! In many cases the stars in your image are not the prime subject you want to attract the most attention to (apart in the case of star- and globular clusters of course). However, stars are the brightest things in your image, so they do demand attention from the viewer, away from your prime subject. In many cases the image is not nicely ‘balanced’ because of this. I therefor always work on softening and shrinking the stars to balance out the image. You’ll be surprised how much of a difference this can make in some cases!
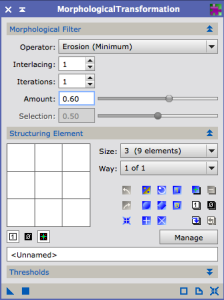
To do this you’ll need a good StarMask to protect the rest of your image, and then simply very gently apply the MorphologicalTransformation process to the stars. I always start with just 1 iteration, with the Amount set to 0.60 and the smallest Size: 3 (9 elements). I apply this to the image and check the result and determine of I need more and to estimate how much this image ‘can handle’. Be very careful with this as you can easily go to far and make the image look quite unnatural.
The final steps is most often several iterations of the CurvesTransformation process. I tweak different parts of the image using different masks to increase color, and to basically ‘balance out’ the whole image.
This is another much overlooked step I think and people use the CurvesTransformation to generic. Make sure you experiment with it a lot and see what happens when you increase very specific parts of the curves. A very precise tweaking can be crucial to get that faint nebula to stand out from the background for instance.
Noise reduction is often (also) done in this stage as well, but personally I almost never like the results of that; the background get’s this ‘blobby’ structure of different colored patches. Always a sign of taking the data to far. I think you are better of with a bit of (fine grained) noise that is less obvious. I therefor almost never do further noise reduction in the non linear stage.
That’s it. The most basic workflow in PixInsight I can come up with for DSLR astrophotography. I’ll start writing detailed articles on each step and update this article with links when they come available.
In the mean time I’d love to hear from you to see if this was helpful, to hear your questions and of course also other remarks and feedback! Leave them in the comments below..

Wonderful article, detailed and very helpful to a newbie. I look forward to further information!
Well done. Thanks for taking the time to document your workflow.
Would you clarify step c) under Preparation and Combination of your data? Does not the BatchPreProcessing register the images and generate a directory with aligned/registered images that can be used directly by the ImageIntegration process? You specify aligning images (unspecified which image set: registered, debayered, etc?) using ImageRegistration but there are three of those to choose from: CometAlignment, DynamicAlignment, and StarAlignment.
Thank you for your time. This lesson has been been very helpful.
Yes you are absolutely correct that the BatchPreProcessing can do the registration as well. I personally don’t because I use the SubframeSelection script after calibration but before registration. Then for registration you need to use StarAlignment. DynamicAlignment is for the scenario in which StarAlignment can’t register the image(s) automatically.
The reason I do SubframeSelection after calibration is because I feel this gives me the most accurate comparison between all the lights. If you’d use it on uncalibrated lights you will be assuming the calibration is perfect and would affect all lights in exactly the same manor. I don’t think this is correct and thus this could result into a wrong comparison. Especially if you would be using darks, since temperature is not consistent on a dslr and thus the dark will match some frames better than others. To be honest, this is exactly the reason I don’t use darks at all, but that’s a whole other discussion 😉
You can’t do SubframeSelection on registered images since you will have dark edges and therefor noise estimates will be off.
I hope this helps. Please feel free to comment and ask if you have any more questions!
Hello,
Thanks very much for the instructions although I can’t really see what I am typing since the text looks way too gray for me. I wonder if this is by design or my Surface Pro is acting up.
How do you save the adjustment made?
Generally I would recommend to save as a project so you can always see and adjust the different steps you took in processing the image
This is very helpful. I recently purchased and have been trying out PixInsight. My go to software to this point has been Photoshop but frankly PI blows my socks off. Is there any guidance or steps that you can give on processing Narrowband images through PI? Thank you.
There are many ways to process narrowband images in PI. Fortunately there are some great scripts for that, so definitely check them out (NBRGBCombination and the AIP scripts). You can also do some quick and easy stuff with PixelMath that is especially useful for creating bi-color images (from Ha and OIII). You could do Red=Ha, Green= 0.8*Ha+0.2*OIII and Blue = OIII (or 0.2*Ha+0.8*OIII) and try different values and see how it works.
Also try and see what results you get to do the channel combination in the linear stages vs non-linear. For me it seems to differ on the data what gives me the best results. If you combine non-linear data make sure the channels are stretched (more or less) to the same intensity and make sure you already take good care of stars (shrink them in OIII!) and bright features (apply HDRMultiscaleTransform and/or LocalHistogram etc. already on the individual channel)
All in all it will be a lot of trial and error and as always depending on the data you have. Both in terms of local sky conditions as well as the optics as well as the object you are imaging.
If you run into specific issues, feel free to get in touch and I’d be more than happy to see if I can assist and help out
Hello Chris
your workflow via PixInsight with the dslr is awesome.
Unfortunately, I’m not so good at English.
is it possible to print the complete workflow with all topics in German?
that would not only help me but maybe many others who can not speak english like me.
cS Mario Richter
Chris, Thanks for the nice shoutout on my book Inside PixInsight! It was named a Sky&Tel Hot Product for 2018 this week, and I’m hard at work on the second edition now. Thanks again!
Thats great to hear! congratz!
Looking forward to the second edition 🙂
Will update this article soon as well, to reflect some of the newly added features in PI
This short tutorial is good because I find that most YouTube introduction too fast for me to follow. Secondly your tips allows me to explore other processing tweaks. I have some decent light frames acquired recently and I can now play around!
Hello Chris
your workflow via PixInsight with the dslr is awesome.
Unfortunately, I’m not so good at English.
is it possible to print the complete workflow with all topics in German?
that would not only help me but maybe many others who can not speak english like me.
cS Mario Richter
Hallo Chris
Ein sehr umfangreicher Workflow über PixInsight.
Besteht die Möglichkeit für jene die kein Englisch wie ich können sich den kompletten Workflow allen Themen auf deutsch aus zu drucken.
cS Mario Richter
Thank you. I have just downloaded the 45 day trial of Pixinsight and want to make sure I get the most out of it before deciding whether to buy. Te weather is terrible so I will be re-processing old data and comparing it to stuff I’ve done in APP. This will make my task a lot easier.