Calibration and debayer of the images you acquired during your imaging session is the first step in the processing workflow. In this article I’ll take a more in depth look into the different aspects of this step. Please note that the BatchPreprocessing script in PixInsight takes care of all the things explained below.
RAW files and when to debayer
I’ll assume you are shooting your images in RAW format (and NOT in JPG), if that’s not the case; start doing that right away! You’re throwing away valuable data and control over the end result if you don’t.
At first it can be confusing at which moment in the DSLR workflow you need to debayer your RAW files. The answer is quite simple though: Debayer your RAW frames just before you do the registration (alignment) and integration of the images. This means that for the calibration of the frames you’ll work with non-debayered files.
The four different type of images used in calibration
For calibration you need to understand we will be talking about four different kind of images that are involved in this process;
- Light frames
- Dark frames
- Flats
- Bias frames
The light frames are the images you took of the object you want to photograph. These frames contain the actual information, the signal, of the object(s) you photographed.
The dark frames (darks) are images that are used to compensate for the unwanted ‘dark signal’ that will be present in your light frames. These frames contain just the ‘dark signal’. This is the information the imaging chip will detect even when there is no light falling on the chip. This is for a great deal thermal noise that builds up when the chip get’s warmer during the length of the exposure(s).
Note: DSLR users need to be careful when using darks and always check if you are not adding noise instead of removing it. Due to the fact that the temperature is not constant for DSLRs during your imaging session it is more difficult to match this thermal dependant signal in non-cooled camera’s and you risk adding noise instead of removing it. Personally I’ve never used darks.
Flat frames are (out of focus) images you take of an evenly lit area, preferably a flatpanel. But I’ve used skyflats (taken at dusk) and even a white image on an iPad with a white t-shirt before.
These images are used to fix vignetting and dust spots in your imaging train. The idea is very simple: make sure you photograph this vignetting and dust spots, and simply subtract this from your lights to get rid of them.
Bias frames are used to compensate for the readout noise of your camera. Please note that since this noise is present in the flats and darks as well as the lights, we need to use them to correct ALL these types of frames and not just the lights. If we wouldn’t do this you would end up compensating for this signal to many times since it is present in flats and darks as well.
Please check here to read all about how to take bias frames with a dslr and how to create a master or superBias
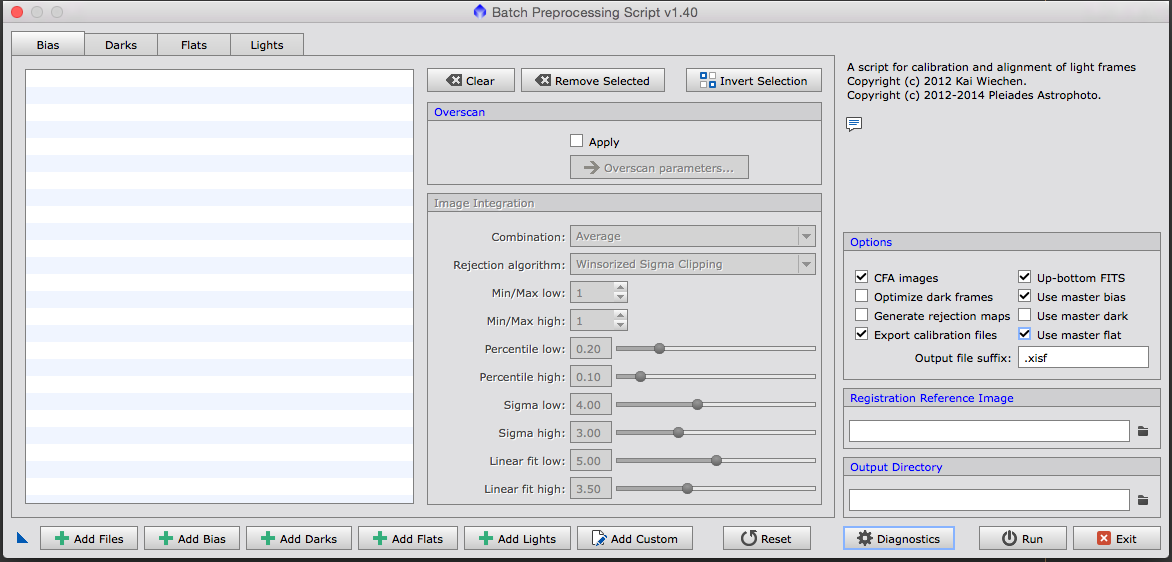
BatchPreprocessing
I could explain in detail in what order you should calibrate all the different types of images and when to debayer, how to create a masterFlat, masterDark etc. etc. But the great thing is PixInsight has 1 script for you that will take care of it all; BatchPreprocessing
When you use the script a window will open in which you immediately will recognise the four types of images we just talked about. Please note that darks and flats are optional, but when you do use one of them (or both) you will need to use bias frames as well.
Now it’s time to load all the frames you just created;
- Click Add Lights and load the RAW files as they came straight out of the camera
- Go to the Lights tab and check the DeBayer settings and adjust if necessary to the right settings for your camera
- Click Add Bias to load the superBias you created earlier.
- Click ‘Add Darks’ if you want to use darks and load your dark frames or master dark.
- Click ‘Add Flats’ to repeat the previous step, but now with your flat files or master flat
- Choose the desired Output Directory for all the calibrated files
- Hit ‘Run’ and you’re done!
If you haven’t got one read here how to create a superBias.
If you make use of a master dark, please make sure you check the checkbox on the right to ‘use master dark’.
The script will create separate folders for each step where it will output the relevant files.
When you are using flats and/or darks for the first time, you can simply load all the individual frames and make sure the ‘use master dark’ checkbox is unchecked. The script will create a master dark and master flat for you when you load all the individual files. So next time you can use this master dark and simply load it and then make sure you do check the ‘use master dark’ checkbox.
Now you will have a folder with calibrated and debayered lights. You’ll continue working with these files. Please not that these are the files in the \calibrated\light\debayered\ folder.
Next step; Image selection and weighing using the SubframeSelector script!

I’m afraid I just can’t get this Script to produce any reasonable picture. The Bias, Darks and flats are converted to GRAY pictures and the final Integration turns out in all red colours.